GREEN TEA HAIR RINSE

  
Hello Lavs, its been a while hasn’t it? Oh well, don’t be upset. I am always on and of the wagon. Anyway, now I am back on the wagon again, I just want to share my in between wash day hair treatment. I usually wash my hair every two weeks, and in-between washdays I do a green tea rinse to reduce hair fall and encourage volume and thickness. This I believe has been one of the secrets to my natural hair being so lush recently, I used to do it when I was in university and I stopped, but I am trying to go back to my old hair habits now (no more lazy natural). Anyway so here’s what you will need below;


INGREDIENTS

4 Bags of Green tea

250- 500ml of Hot water

A mug or glass jar


DIRECTIONS

1.Place the four bags of green tea in your glass jar or mug, pour hot water over it. Cover the jar or mug and allow it to cool for about 10-15mins. If you want the brew to be strong you can leave it for up to an hour in the fridge. I leave mine over night in the fridge, mainly because I forget it there, oh well it works great and the tea brew is pretty strong at this point.

2.Strain the tea bag, and pour the cooled green tea in a applicator bottle, or you can simply leave the cooled green tea in the jar.

3.Pour it all over your scalp and gently massage your scalp in a circular motion. GENTLY MASSAGE YOUR SCALP, you are not trying to wash you hair here.

4.Use a cotton shirt or cloth to take out the excess dripping water and cover your hair with a plastic cap for about 20mins.

5.Rinse out with cool water and you are done!!!


 WHY GREEN TEA HAIR RINSES WORK

Green tea contains high amount of antioxidants and caffeine that promote hair growth. The catechins in it have 5-Alpha-reductase inhibiting properties that help block the growth of DHT ( Dihydrotestosterone) which hinders hair growth and causes  hair fall.

Due to it’s antiseptic properties it also helps cure common scalp irritations like dandruff and psoriasis by reducing inflation.

Green tea also helps stimulate hair growth in the hair follicles and softens the hair. Thus, in addition to stopping excess shedding and hair fall, it contributes to the generation of new hair. It contains vitamin E and C, and polyphenols known to boost voluminous hair.

WHEN TO DO A GREEN TEA RINSE?

You can do it as an in between wash hair treatment like I do, or use it as a rinse after washing and conditioning your hair.

 RESULTS THE DAY AFTER

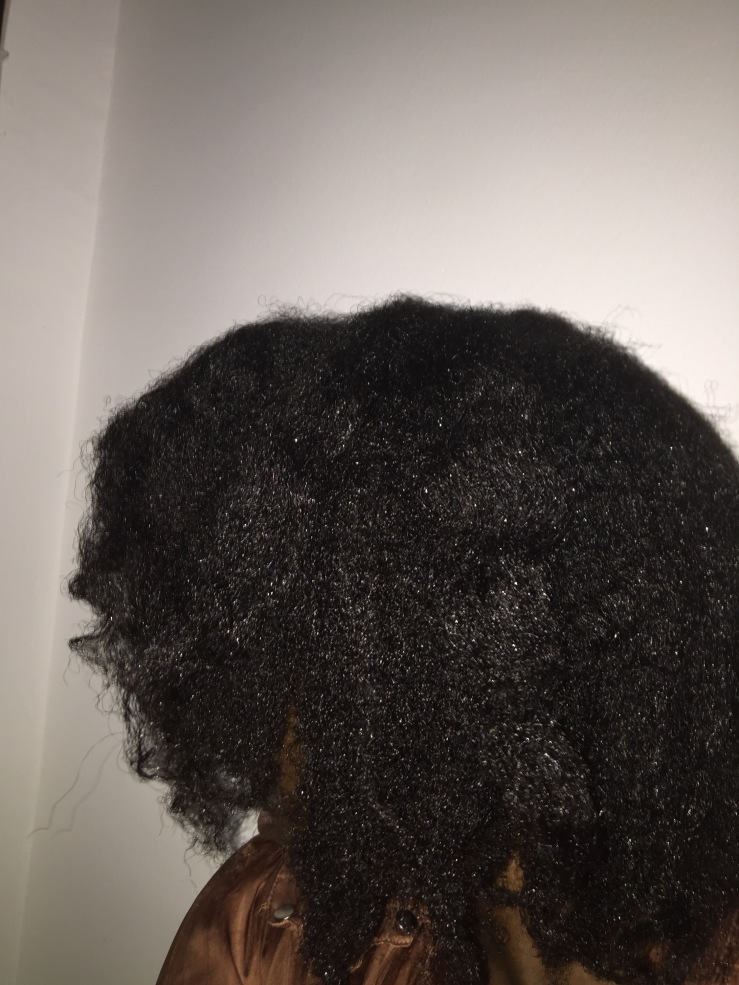
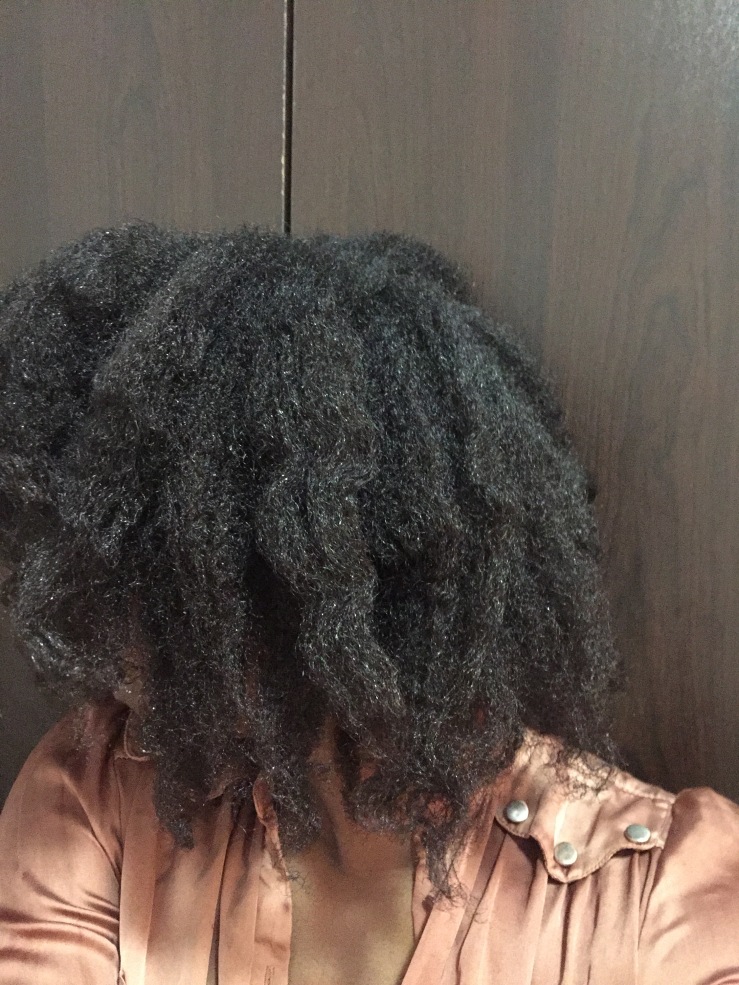
Hair has already dried, been moisturised and sealed. Sorry I forgot to take a picture during the rinse.

  
There you go guys!!!! Have a great weekend!!! Today is Friday I am off to do my green tea rinse hair. xxxxx


NATURAL HAIR CARE REGIMEN FOR BEGINNERS

IMG_2782.jpg

Hey hey hey, does the natural hair game seem a bit daunting? ToI many rules, don’t pre poo before your wrap your hair with the golden scarf? etc, etc. Well here is a simple hair regimen for everyone!!

  1. Detangle

Lots of hair is usually lost during the detangling process. A poor detangling method can lead to large amounts of breakage.  Detangling should be as gentle as possible. Detangling should only happen a maximum of once a week. Use more of your fingers so you can feel the knots in your hair before using a comb, and only use a wide tooth comb on your hair. DO NOT COMB EVERYDAY, only comb when hair is damp or saturated with conditioner, start from the ends and work your way up to the roots. DIVIDE YOUR HAIR IN SECTIONS ALWAYS DURING THIS PROCESS.

  1. Cleanse

Wash hair no more than once a week with a sulphate, DEA, MEA,TEA, UREA, phalates, Paraben, Mineral oil, silicone free , petrolatum etc free shampoo ( just by an organic or natural shampoo) or co-wash. AGAIN CLEANSE IN SECTIONS! Its important to clarify with a shampoo once a month or once every two months if you use a co-wash.

You can also chose to PRE POO with oil, however if you are using a co wash, this may not be necessary. Pre pooing (Pre shampoo) is when you apply oil to your hair and cover your head with a plastic cap and allow the oil to sit for at least 30mins, in order to protect your hair from drying out after shampooing.

  1. Condition/ Deep condition

Once you have cleansed your scalp, its important to add some moisture to your strands through conditioning. However, you can choose to skip the regular rinse conditioner step and go straight to deep conditioning, especially if you used a co wash. AGAIN DO THIS IN SECTIONS.

You can use a moisturizing or protein conditioner, depending on your hair needs. If you are using a protein conditioner, always follow with a moisturizing conditioner to achieve a protein and moisture balance. This balance aids hair flexibility and length retention.  Deep conditioners work best with heat, use a heat cap, hooded dryer, wrap your head with a towel to generate body heat, or work out while the deep conditioner is in your hair. DO NOT APPLY CONDITIONER TO YOUR SCALP!!!! EVER! This is because, some conditioners can clog your pores and stunt hair growth.  Deep conditioning should be done twice a month- once a month, especially if a co wash is used, otherwise weekly.

  1. Moisturize and Seal

After cleaning and conditioning the next step is moisturization and sealing. Improper moisturisation always causes hair loss and breakage. Dry hair breaks! Please see this post for the difference between greasy and moisturized hair, the two are often confused. The proper way to moisturize is the L.O.C method.

L- Liquid/Leave in

O- Oil

C- Cream (or butter)

Always use a leave in conditioner with water as its first ingredient or just plain water first on your hair. As water is the only true ingredient that moisturizes our hair. Follow with an oil and cream/butter to seal in the moisture from the water or leave in. Oils and butters are sealants, they cannot moisturize our hair, thus applying an oil or butter to dry hair will only leave it greasy.  Repeat this daily or every other day, even when its not your wash day.

  1. Protect

The final portion of this regimen is to protect your hair, style your hair in protective ways do braids, weaves, updos etc to prevent dryness and breakage. Sleep with a satin cap to prevent the cotton in your pillow case from dragging at your hair strands and snapping them of. Avoid the use of frequent heat, idealy your hair should only be blowdried a maximum of once a month. AVOID STRAIGHTNERS!!! Trim your ends no more than twice a year to get rid of knots and split ends, after your initial trim, with your new healthy hair practices and products you wont need frequent trims. Do NOT do tight hair and tight buns, they cause hair loss and baldness. Also do not scratch your scalp with your fingernails, this also causes baldness as it kills the hair follicles.


Have a blessed evening guys!


HIDDEN DANGERS OF PROTECTIVESTYLING

4 hidden dangers of protective styling

Now that’s a title we all thought we would never see right? Well after an interesting experience I had with braids, I have to say long term protectivestyles are hot but they aren’t on fire! Lol in English that means that there are problems with protective styling, and its not perfect.  Let’s jump in, shall we?

Dryness, when you have your hair in a protective style like braids, weaves or even corn rows, you tend to forget about them and let your hair strands beneath fend for themselves. When you don’t wash, condition or moisturise your hair even while its in a protective hairdo it will get very very dry, and as I always say dry hair breaks. Also, even if your hair is conditioned, moisturised etc while its in a protective style, the fact is conditioners and moisturisers can’t penetrate your strands while its underneath a braid or a weave as well as they would if your hair was loose.

Damage to your edges, tight braids and tiny braids damage your edges.  When the braids/weaves/corn rows are too tight, they put too much pressure on your scalp and ruin the blood flow to your follicles, this in turn causes hair fall or baldness. When braids are too tiny, when you take them out it usually leads to you losing your edges. So my dear Nigerian sisters, never ever do one million braids as a means of protective styling, just say good bye to your edges if you attempt them. Also, when you leave some hair out in your weave and you are constantly using heating tools to blend your leave out hair with your silky straight or European curly weave, that also causes breakage for that part of your hair, as the heat will literally burn of your hair and weaken your strands.

They weigh down your strands, when you use 20packs of expression or 50 packs of kinky braids on your hair you put excessive pressure on your scalp and strands. This leads to baldness, that’s why you find that sometimes your braids just fall of your scalp, with your hair in tow (lmao this used to happen a lot when I was a child). Avoid anything that puts excessive pressure on your hair and scalp.

Tangles, leaving protective styles in for too long can cause the tangles of a life time!!! Oh I need to do a separate post on how my hair endured some very serious untangleable (if that’s a word) tangles!!!! It was terrible! I left my braids in for 8 weeks, and on top of that transgression I took them out and was too tired to detangle the huge knots at the time, so I left them tangled for another 2 weeks before detangling!!! Oh it was a terrible nightmare!! While washing and conditioning your hair is great while it in a long term protective styles, it also causes build up near your roots, where your stylist picks your braid to attach it to your hair. That build up clumps together and creates amazing knots, that are difficult to untangle!!!

So there you go, the hidden dangers of protective styling, to avoid these horrible realities, always wash, condition and moisturize your hair while its in a protective style and never leave your braids and weave in for more than 6 weeks!! Also, remember to dilute your conditioner and shampoo with water before your wash your hair will its in a protective style, this reduces the build up that cause those massive clumps in your hair.

Have a blessed day 😉


My night time routine! 

  
Hi guys! 

This is just a quick post detailing what I do to my hair before bed. I perform this ritual to keep my hair moisturised and tangle free constantly. After my recent experience with detangling I have learnt that prevention is better than cure!! Every natural both new and seasoned must keep their hair in a manner that prevents it from tangling on itself while you are asleep. It’s necessary to prevent future breakage and hassle. This process takes about 10-15mins. So here is what I do: 

1. I spritz my hair with a mix or rose water and peppermint oil ( this oil is now my new best friend since I discovered it scientifically grows hair, see HERE for that post). That’s why in the video below I kept closing my eyes, the oil stings the eyes a bit. This step is optional and you can go straight to the leave in, but I like the extra moisture it gives.

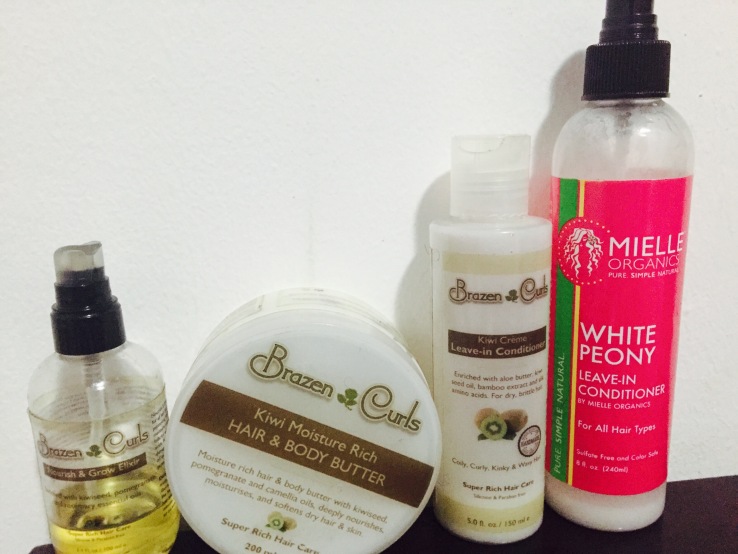
2. I put my hair in sections, spritz each section with my rose water and peppermint oil, follow with either my Mielle Organics White Peopy Leave in conditioner or My Brazen curls Kiwi creme leave in, both are sold HERE, then I use my Brazen curls growth enhancing oil also sold at the beautifully nappy shop, then seal all the moisture up with Brazen curls hair and body butter. 

3. I twist up each section after moisturizing. Afterwards I roll each section up in a Bantu knot, this step is totally optional. 

As you can see in the video I do light finger detangling and dusting as well, so my hair is nice and tangle free in the morning.

Please see the video below for full details. This is so cool I am easing into doing videos!! Yay lol. 


Results this morning!!!


DIY ACNE REMEDY CLAY MASK


Hey hey,

This post is long overdue, this is natural mask I use when I have hormonal acne or when my skin is acting up. I use this mask once a week, it balances my sebum production and keeps my skin clear and beautiful. Its an excellent natural alternative to chemical solutions. Suitable for sensitive skin. If I have any pimples prior to doing the mask, after 1 or 2 sessions the pimples reside. So yes I love it.

This mask is ideal if oily, acne prone skin like mine. What you will need

  • Aloevera powder – 1 teaspoon
  • Activated charcoal (optional) – 1/4 teaspoon
  • Turmeric (optional)  – 1/2 teaspoon
  • Fullers earth clay- 1 or 1/2 table spoon
  • Amla powder- 1 teaspoon
  • Rosewater/ Aloevera juice/ purified water- enough to make a paste

Combing all these ingredients in a bowl and leave on your skin for 5-10minutes maximum. Don’t wait for it to be totally dry and flaky, leaving face masks on for two long can draw out moisture from the skin and cause further irritation. So no longer than 10minutes. See short video below for the general idea.


So why it will work?? Ingredient break down time:

  • Aloe Vera powder- This powder product of India is derived from the whole aloe plant. It contains vitamins A, B1, B2,B6,B12 ,C, E, and folic acid. It’s filled with minerals like iron, calcium, zinc, potassium, sodium etc making it excellent for both the hair and skin. It will help heal the scars on your face, moisturise your skin and heal pigmentation and burn marks. This powder aids cell regeneration and its intensely healing. It will reveal a glowing and bright skin after a 1 or 2 applications. To purchase see Here

  • Amla powder: Rich in vitamin A, which is essential in collagen production Amla powder helps to keep the skin elastic and youthful looking. It’s anti- inflammatory and helps calm red, blotchy skin. Amla is also rich in vitamin C and naturally brightens and lightens the skin. To purchase see Here

  • Tumeric powder: This is great for oily and acne prone skin. High is vitamin C it also naturally lightens dark spots. It’s antiseptic and anti bacterial in natural so it fights breakouts and pimples to keep the skin looking youthful. It’s soothes skin burns and it’s excellent in the treatment of wrinkles.

  • Activated charcoal: This is used to trap and flush out toxins from the body! Both internally and externally. The activated charcoal will draw out impurities from the skin. It’s effective in treating acne, body odor, insect bites and rashes.

  • Fullers earth clay: Nature has provided this magic clay to ease all our skin woes. It has oil absorbing, cleansing and antiseptic properties. It improves the skin complexion, treats acne, fades scars and improves skin elasticity. To purchase see Here

  • Rosewater: I used both Rosewater and bottled water in this mask,  because my rose water had ran out it wasn’t enough to make a full paste. Rosewater helps calm inflamed skin, it’s filled with antioxidants and it’s also anti aging. It’s a great cleanser and removes oil and dirt in accumulated clogged pores. It helps hydrate, moisturise and revitalize the skin. It helps strengthen skin cells, and regenerate skin tissues. To purchase please see Here

Have a blessed day everyone!!! Xxx

Dos and Donts of child hair care


Okay, I know the title sounds judgmental, but no, I am not telling you how to style your little angels hair, I am only suggesting things you could do differently. However, not every hair style is suitable for a little girl or boy’s (if you are growing your son’s hair) hair, this is because some of these hair styles damage your kid’s hair before they get a chance to damage their own hair. To be honest, these types of styles damage anyone’s hair, but I feel especially bad when little children’s hair lines are already being ruined and they are being submitted to a life of stunted hair growth before they get a chance to complain.
 

Too heavy
 
 The scalp on your little one’s head is still fragile and so is the hair that comes out of it, especially in kids below five. Don’t use heavy extensions in your child’s hair, and Don’t do tight braids, these put too much pressure on their delicate scalp and will lead to a receding hair line and stunted hair growth. Essentially, you are setting your child up for short hair, right of the bat, this is the reason why many black women feel their hair can’t grow, because permanent damage might have already been done to their hair follicles while they were children. The hair braiders in the market and in most salons are quite brutal, I remember once threading my hair and it felt like my forehead had been shifted into my scalp! She pulled my hair so tight and I just had a horrible headache and I was already about 8 years old then, I can only imagine how a 2-year-old will feel. Your little girl/boys hair should still be in nice bubbles or should be woven without any extension, so there is little or no tension on the scalp. Your children don’t need extensions; in my own opinion it just makes them look grown up! So if you can, let go of that bob hairstyle with “attachment”,that will be great!

Too tight

Do monitor what is happening to your child’s hair, does it look pulled at the roots? Then its probably too tight and should be loosened immediately. It just breaks my heart to see kids with receding hair lines. Don’t let the hair stylist give you any excuse as to why they are pulling your child’s hair, some even claim its not tight at all, ask your child or look at the hair, tight braids/weaving look tight and pulled at the roots ( like the picture above). Don’t do tight buns or any other style that make creates excess pressure on your child’s scalp or pulls on their edges.

 Don’t relax your baby’s hair! I implore you!!!! There is a limit to these things, gosh the burns I used to get at the salon! Your little one’s scalp does not need that kind of hair stunting drama. I know she/he cries when you are combing their hair, but that’s not an excuse to relax it, the chemicals in relaxer can strip the color of boots and burn plastic, please let your little one decide for themselves whether they want to put something so harsh in their hair. Relaxers disturb the hair PH balance and break down bonds that hold together the proteins in the hair shaft. Relaxers, ruin hair, and cause scalp irritations. I can go on forever about how horrid relaxers are, but that for another post. Speaking of combing, Do comb your baby’s hair with a wide tooth comb, gently from tips to roots, Do make sure your child’s hair is either damp, or has a conditioning agent in it before combing. Do divide their hair into sections throughout the washing, combing and styling process.

Do monitor your child’s hair products, look at the ingredients of the products you use. I beseech you! My next post is going to be on this, simply turn the back of anything you buy or want to buy to be certain the product is what it says it is on the front. There are several products out there that claim they are organic and are not! I have seen products claim pure coconut oil and yet they have petroleum products in them. So you need to avoid the sulphates, MEA, DEA’s , Petroleum, Parabens and other harmful chemicals when choosing hair products for your little one and for yourself. For healthy hair product suggestions for you and your kids see Here

If you are a DIY mum, during styling Do make sure your child is sufficiently occupied, make them comfortable with food/snacks/Video games/ Cartoons etc, anything to distract them from what you are doing and encourage them to sit steal. When your child is hungry/tired/bored they become restless and upset during the styling process and making the process very difficult.


Finally, Don’t do too much, your child is probably impatient and cannot sit through a 10 step conditioning method. The only thing they really need ( if their hair hasn’t been previously damaged) is a good cowash, or a shampoo and rinse conditioner, a leave in conditioner or some oil.

Do let me know your thoughts in the comment section!! Have a blessed day guys xxx

Washing my hair in Plaits

So my natural hair journey has changed since I became a mum. No time for a 15hr hair regimen! Baby wont eat? Henna will drip into my sons eye etc. lol I am exaggerating, but you get it. I have been looking for way to cut down wash day time, and I first tried the 25 minutes washing and detangling method by Naptural85, while that was fast, it didn’t help my hair, after a while I started experiencing major clumps at my roots.  Plus, Naptural85 and myself have very different hair types, my kinky hair did not allow me to escape unscathed from trying to rush wash day. Another problem a lot of us naturalistas have is completely copying your favorite naturals hair routine! Please try out techniques, but always pay attention to what works for your hair.

I have weird hair that likes to clump at the roots, instead of tangle at the ends like normal people, so I stumbled on the technique of washing your hair in braids without loosening the braids. Okay, I didn’t stumble on it, I buy and read books on natural hair care a lot. Anyway, I like the results I got, it was easy, fast and no clumping anywhere!! Score!

This is suitable for tightly curled hair types, hair with multiple kinky textures, high shrinkage hair and long hair. This technique helps immensely in counteracting tangling and excess shedding. In order to attain the best results, detangle your hair properly before braiding it, no point washing tangled hair in braids, you are just making the situation worse. So this is how I went about this:

  1. I detangled my hair using this dry detangling hair technique by Igbo Curls however I used lots of coconut oil instead of Olive oil , for my other detangling (damp hair)  techniques see here.
  2. I put my hair in large and lose braids. The braids/plaits have to be a little big and loose to allow access to your scalp and for the products to clean your scalp properly.
  3. I applied shampoo to my soaking wet hair and scalp. I massaged it into my scalp and smoothed it into my plaits, worked up a good lather and rinsed it out. The plaits do not come undone. Sorry I forgot to take a picture at this stage. 
  4. Afterwards I wrapped a cotton shirt around my hair for it to dry. I find its best to apply conditioner when my hair is damp or almost dry, otherwise it drips of my hair. After applying conditioner to each plait, I cover my hair with a plastic cap and leave the conditioner on for 45mins -1 hr. If you have a steamer all the better. The plaits do not come undone.  
  5. Rinse out the conditioner thoroughly, use a cotton shirt to dry your hair. Loosen one plait, lightly finger detangle, apply a leave in conditioner, apply oil and a cream/butter to seal in the moisture. Then re-plait or twist your hair.  

Results After washing and conditioning


My hair and scalp look super clean so yippe! Let me know if this method cleaned your hair efficiently. That’s all folks! Super fast and easy! 

Product Review: Brazen Curls Kiwi moistursing shampoo

IMG_0152


Honestly! This review has been long coming, but I had to wait for the rest of the Nigerian natural community to use these awesome products before I gave my review. Since I sell these products I don’t want to seem biased!!! While the other items in the new brazen curls range are amazing, the shampoo is my very favorite shampoo in the entire universe!!!! To all my followers, you all know that rhassoul clay is my baby, rhassoul clay is the only thing I use to cleanse my hair and it’s the best thing since my healthy naija buns!!! How-e-ver, this shampoo is my new friend!!! I have decided to incorporate it into my regimen and use it at least once a month.

This shampoo is the bomb!!!! It actually lives up to its name and its indeed a moisturizing shampoo. Aside from it conditioning abilities, it strengthens the hair with continuous use.  I have used it several times and it has been great every time. It’s so gentle it’s suitable for children, see my Instagram page for proof.

Its like washing your hair with oil that lathers! It doesn’t strip the hair at all, not even a little, the ingredients are simple and are designed to gently cleanse your hair without stripping the hair of its natural protective oils.

After shampoo WET
After shampoo WET
After shampoo DRY
After shampoo DRY

The ingredients are; Aqua (deionized water), capryl glucoside, cocamidopropyl betaine, glycerin sodium benzoate and potassium sorbate, hydrolysed wheat protein, xanthan gum, citric acid, aloe vera leaf powder, and kiwi seed oil. First of all, this is an amazingly short list of ingredients for a shampoo, and that’s a great thing. The simpler a product is, the better it is for us. Our hair has less to deal with, and its easier to do research on the ingredients used.

The shampoo, is considered a luxury shampoo, because of its exotic organic ingredients and love the manufacturer has put into creating this product, and yes its Naija owned! Hand made Nigerian goodness.  So let’s do a breakdown of the ingredients, shall we?

  1. Capryl Glusoside: This is an excellent gentle cleansing surfactant, which is made from renewable raw materials, fatty alcohols and glucose from vegetable origin. Its actually described as an ultra-gentle, natural, cleansing and foaming agent, free from impurities and preservatives. The presence of fatty alcohols makes this product amazing for curly hair types, as these are good alcohols that provide sheen, reduce frizz and soften the hair.
  2. Cocamidoprophyl betaine: This is generally regarded as a mild and safe ingredient. Its used to replace cocamide DEA (which is more dangerous for the hair and health). It’s a well known conditioning and moisturizing agent. It provides a fatty layer that provides emollience and manageability.
  3. Glycerin Sodium benzoate and potassium sorbate: This is a liquid preservative commonly used in natural cosmetic formulations. It has a skin friendly P.H value of up to 5.5. This means that this shampoo will not upset the natural PH balance of your hair. Thus, preventing hair loss, irritation, fungi and bacteria in the hair and scalp. This ingredient is derived from coconut.
  4. Hydrolysed wheat protein: This in my opinion is the best part of this shampoo!!! Its produced by either the acid or enzymatic hydrolysis of wheat protein. Essentially its wheat protein made small enough to penetrate the cortex and moisturize and strengthen our hair. It actually helps stop breakage, because it performs the dual function of strengthening and moisturizing, it helps the hair maintain a balance between being strength and flexibility thus reducing breakage. It attracts moisture to the hair strand and improves its ability to maintain moisture. So if your hair is suffering breakage this is the shampoo for you! At the moment by post partum hair loss is not smiling at me!!! So this shampoo is by best friend. According to Natural Wellbeing  “It can also help repair damaged hair follicles making hair fuller and softer to the touch”. This shampoo is also great for protein sensitive people, as wheat protein is considered a gentle protein, due to its moisturizing balance.
  5. Xanthan gum: This is a plant based thickening and stabilizing agent. Its regarded as safe for consumption and its used in many cosmetics and even in food.
  6. Citiric Acid: This is found in citrus fruits and it’s a natural preservative. Its totally safe for consumption and considered mild.
  7. Aloevera leaf powder: This amazing powder, aside from its many medicinal benefits, this organic powder made from the aloe vera plant works wonders for the hair. It stimulates hair growth, conditions the hair, soothes and heals irritated scalp, and nourishes new growth.
  8. Kiwi seed oil: This exotic oil is now being considered the “wonder fruit”, both by scientists and the natural community. Its helps maintain moisture in the skin and hair, rich in vitamins that the hair and body needs, helps fight dandruff and rough and dry skin and hair. Its high in phytonutrients (naturally occurring nutrients found online in plants), minerals, magnesium and vitamins C&E. It also contains over 60% of Alpha linoleic acid which is especially beneficial for the hair.
  9. Deionised water: I didn’t talk about this first, because there is nothing special here lol. As the name implies, its water with all the ions removed. It’s the purest form of water and its best for our hair. Tap water has so many mineral and metals in it, that if it’s used to formulate a product it will actually spoil the product. Also also tap water, will cause buildup on the hair because of the minerals and metals present. However, the use of deionsed water in shampoos, conditioners etc. should be common practice (I hope) . Furthermore, I would like to add here that water is the best ingredient to moisturize our hair, so it should be the first or second ingredient to look out for in shampoos, leave ins, conditioners etc. This product obviously has water as it’s first ingredient.

So there it is, a break down of the ingredients, I am really pleased with this as you can tell from the post lol. It does the job, it truly cleanses and moisturizes and it has such an amazing scent. Oh my goodness! Yes, the scent is natural too, however, the manufacturer has decided to discontinue the use of even natural scents going forward. She cares about the health of her customers, recent research has shown that even natural scents may not be all that great.  So its just essentials oils that will be used to scent the product from here on!


Price N5900. You can purchase it from yours truly! Via email: beautifullynappy@gmail.com or via BBM: 584EB6EB

Have a look at what others think about the Brazen Curls brand from The Kink and I and Sotectonic

How to deep condition your hair part 2

  
How the deep conditioner is used on your hair will affect the type of result you get at the end of your DC (Deep conditioning) session. Factors such as Heat, Time and Hair PH affect the overall result you get after deep conditioning.


Higher hair PH results in cuticles that are more open. When cuticles are open it gives the conditioner an opportunity to really penetrate the cortex, as opposed to when the cuticles are closed. Damaged hair or hair chemically processed in some way usually have more open cuticles as opposed to natural healthy hair. Hair is most vulnerable when cuticles are open. Its important that a deep conditioner with low PH is used to close the cuticles and prevent further damage.


The longer the conditioner is in contact with the hair, the more the conditioning agents can bind to the hair and the active ingredients can penetrate the cortex. However, there is no great value added when hair is conditioned past 30mins, as key/active ingredients like the surfactants and hydrolyzed proteins will be absorbed will be absorbed into the hair within a few seconds, and in general the conditioning effect is present for up to 25-30mins.


The higher the heat used the better the conditioner penetrates the cortex. The hair should be at about 60 degrees Celsius for maximum penetration (don’t cook your head).


Technique (PLEASE NOTE YOUR HAIR MUST BE IN SECTIONS THROUGH OUT THIS PROCESS)


1. Shampoo with a sulphate, phalate, DEA, MEA,TEA, PEG free shampoo (Lol, so many things to avoid! Just use REAL natural or organic shampoos).

2. Use a cotton shirt to remove excess water from the hair. Do not apply your deep conditioner to dripping wet hair, because the conditioner will just run of your strands and it wont accomplish its job. Apply the DC to the ends of the hair and gradually work it up to the roots, however you must avoid your scalp. Never put a deep conditioner on your scalp purposefully, as this interferes with the natural sebum production of your scalp and causes irritation and creates build up.

3. Cover your hair with a plastic cap, then go under a hooded dryer, steamer, heat cap or wrap your head with a towel, let it sit for 20-30mins. The heat allows the hair shaft to open up for the deep conditioner to penetrate. Low-medium heat is fine.

4. Use cold water to rinse out the deep conditioner, this is because cold water is conditioning and helps close the hair cuticles. Leaving the hair feeling silky soft and smooth.

5. If you are protein conditioning, rinse out your protein conditioner and repeat step 2-4 with your moisturizing conditioner. However, leave the moisturizing conditioner in for at least 30mins. This is because protein conditioners leave the hair feeling hard from strengthening, its important to moisturize the hair for flexibility, softness and greater manageability.

6. Wrap hair with a cotton shirt to squeeze out excess water. Do not scrunch your hair up with a towel, it creates, frizz, tangles and leads to breakage. If you don’t have a cotton shirt to wrap your hair with, just wrap your hair with your regular towel but DO NOT USE IT TO RUBB YOUR HEAD, or allow your hair to drip dry.

7. Follow with a Leave-in conditioner, and Oil and a Cream/butter.


How to deep condition Part 1


 Hey hey, this time I didn’t actually stay away for too long. So the title looks basic right? Its something you wouldn’t think needs addressing……but it does!

Deep conditioning is a very important practice; it can improve your hair or damage it over time. It’s the process of fortifying your hair with either protein or moisture to achieve that protein moisture balance your hair needs to flourish. It important to note that deep conditioners are best as a preventive measure, they have no magical powers to repair already damaged split ends or severely heat damaged hair, the only way to treat dead hair is to cut it of!! Most of the time when serious damage has occurred one cannot retroactively remedy the problem (e.g. when there is excessive heat damage).


When to deep condition?

 Generally, a regular moisturizing rinse conditioner should do the trick, and deep conditioning should not occur more than once or twice a month. However, these are the tell tale signs that we need to deep condition:

1. Breaking hair

2. Dull looking hair

3. Highly porous hair

4. Split ends or mid shaft splits (holes in your hair shaft)

5. Loss of elasticity

6. Dry and brittle hair

7. Lots of tangling


Why deep condition?

 A good deep conditioner should help your hair withstand wear and tear from styling, cleansing, sun/heat etc. Conditioning should also improve the health of your hair and make it healthier. Conditioning should help you achieve certain goals:

1. Increased softness and bounce

2. Increased hair flexibility and strength

3. Ease of combing

4. Reduction in hair porosity

5. Better shine

6. Minimize frizz and fly away

7. Reduce breakage

8. Improve manageability


How to spot a good deep conditioner?

 Just because a deep conditioner is expensive doesn’t mean it would be great (usually a decent correlation though! Lol) and just because a deep conditioner is cheap doesn’t mean it would be crap (also an amazing positive correlation there!! Lol). So you have to know what to look for in the ingredient list! ……. PLEASE CHECK THE INGREDIENTS OF THE PRODUCTS YOU BUY!!! Knowing the right type of ingredients to look for at first glance will really help you chose a deep conditioner that it right for you;

 Firstly, search for ingredients that attach onto the hair, this is because conditioning agents are meant to adsorb into the hair, this means that the ingredients have to attach to the hair. Ingredients that attach to the hair or bind to the surface of the hair are responsible for softness, manageability, reduction of flyaway hairs, detangling and smoothing of the cuticle. Hair carries a negative charge, its important to look out for surfactants with a positive charge (conditioning surfactants) as those will be attracted to the negative charge of the hair and bind to the surface of the hair. Examples of such are Behentrimonium Methosulfate or BTMS, Behentrimonium Chloride and Centrimonium chloride. Also look for emollients like cetyl and cetearyl alcohol, murumuru butter, coconut oil, olive oil, aloe vera (juice, gel, oil or butter), butylene glycol. Also look for cationic polymers like guar gum, some silicones also attach to the hair and convey benefits.

 However, silicones create buildup on the scalp, causing irritation and blocking the hair follicles, thus stunting or slowing growth. Although, it is important to note the type of silicone (although I try and avoid them all together) contributes to the extent of build up. Dimethicone is one of the silicones with high molecular weight, its heavy and very hard to wash of since its not water soluble. On the other hand, Cyclopentasiloxane is water soluble, and very volatile, thus it doesn’t accumulate. At this point, I would like to recommend a natural alternative to silicones like broccoli seed oil, to avoid other negative effects of silicones. You can usually detect silicones as they have names ending in –cone or –siloxane e.g. dimethicone, cyclomethicone, cyclopentasiloxane etc.

 Secondly, search for ingredients that penetrate the hair, especially in your protein conditioners. While it is great to splatter egg on your hair, in the name of protein conditioning, you might not be getting the best benefits. Protein conditioners have ingredients that strengthen, and reinforce the hair structure. They have to be full of hydrolyzed proteins to work, meaning that the proteins have to be small enough to penetrate the hair shaft. Protein treatments work by filling the gaps present on your hair strand and forms a temporary bond. Hydrolyzed proteins are not the right size and simply cannot do this, so your eggs are probably better for your hair when you consume them.

 Thirdly, check the consistency of the deep conditioner, creamy conditioners are the very best, they are usually excellent in detangling. However, please not DO NOT DETANGLE when you have a protein conditioner in your hair, medium to heavy protein conditioners make the hair hard and stiff, its never a good idea to comb the hair while a protein conditioner is in your hair.

 All types of conditioner must contain water, it should be the first or at the very least second ingredient, as water is the ultimate moisturizer for the hair.


Protein or Moisturizing conditioner?


Protein conditioners are necessary when the hair is breaking due to over moisturization, limp, fine, relaxed, damaged etc. While moisturizing conditioners should be used when hair is very dry, hard, breaking due to dryness etc. It is important to understand that hair need s a protein and moisture balance to grow/retain length. Too much protein makes the hair overly dry, stiff and hard, while too much moisture makes the hair limp, and weak.

In part 2, we would look at the technique for conditioning and how to get the most out of your deep conditioning session.