GREEN TEA HAIR RINSE

  
Hello Lavs, its been a while hasn’t it? Oh well, don’t be upset. I am always on and of the wagon. Anyway, now I am back on the wagon again, I just want to share my in between wash day hair treatment. I usually wash my hair every two weeks, and in-between washdays I do a green tea rinse to reduce hair fall and encourage volume and thickness. This I believe has been one of the secrets to my natural hair being so lush recently, I used to do it when I was in university and I stopped, but I am trying to go back to my old hair habits now (no more lazy natural). Anyway so here’s what you will need below;


INGREDIENTS

4 Bags of Green tea

250- 500ml of Hot water

A mug or glass jar


DIRECTIONS

1.Place the four bags of green tea in your glass jar or mug, pour hot water over it. Cover the jar or mug and allow it to cool for about 10-15mins. If you want the brew to be strong you can leave it for up to an hour in the fridge. I leave mine over night in the fridge, mainly because I forget it there, oh well it works great and the tea brew is pretty strong at this point.

2.Strain the tea bag, and pour the cooled green tea in a applicator bottle, or you can simply leave the cooled green tea in the jar.

3.Pour it all over your scalp and gently massage your scalp in a circular motion. GENTLY MASSAGE YOUR SCALP, you are not trying to wash you hair here.

4.Use a cotton shirt or cloth to take out the excess dripping water and cover your hair with a plastic cap for about 20mins.

5.Rinse out with cool water and you are done!!!


 WHY GREEN TEA HAIR RINSES WORK

Green tea contains high amount of antioxidants and caffeine that promote hair growth. The catechins in it have 5-Alpha-reductase inhibiting properties that help block the growth of DHT ( Dihydrotestosterone) which hinders hair growth and causes  hair fall.

Due to it’s antiseptic properties it also helps cure common scalp irritations like dandruff and psoriasis by reducing inflation.

Green tea also helps stimulate hair growth in the hair follicles and softens the hair. Thus, in addition to stopping excess shedding and hair fall, it contributes to the generation of new hair. It contains vitamin E and C, and polyphenols known to boost voluminous hair.

WHEN TO DO A GREEN TEA RINSE?

You can do it as an in between wash hair treatment like I do, or use it as a rinse after washing and conditioning your hair.

 RESULTS THE DAY AFTER

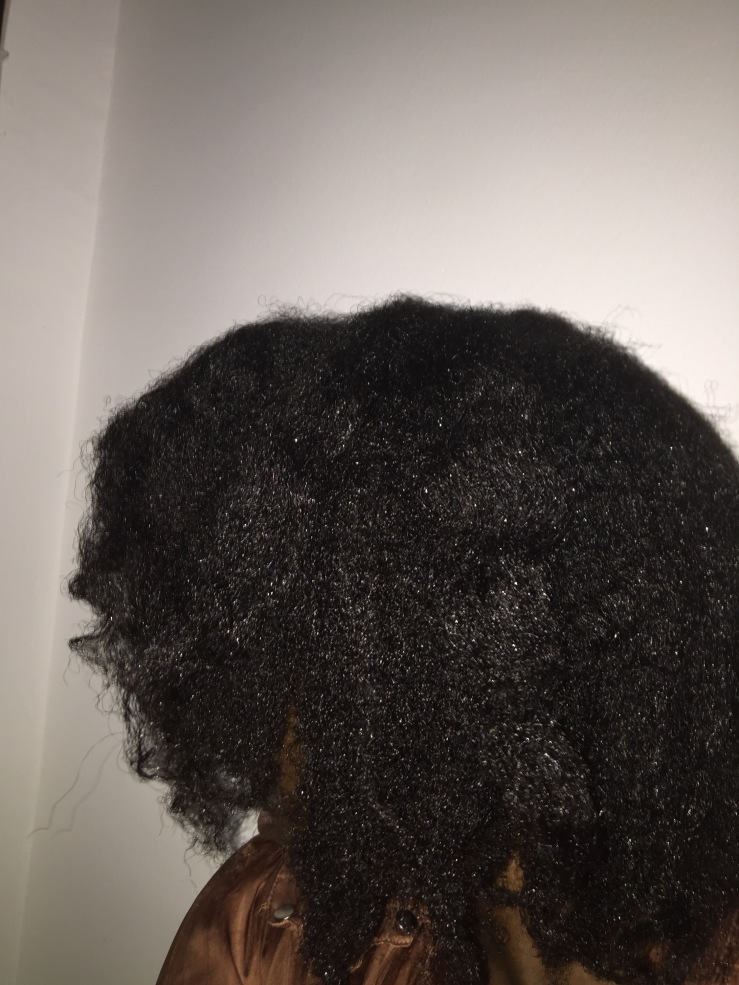
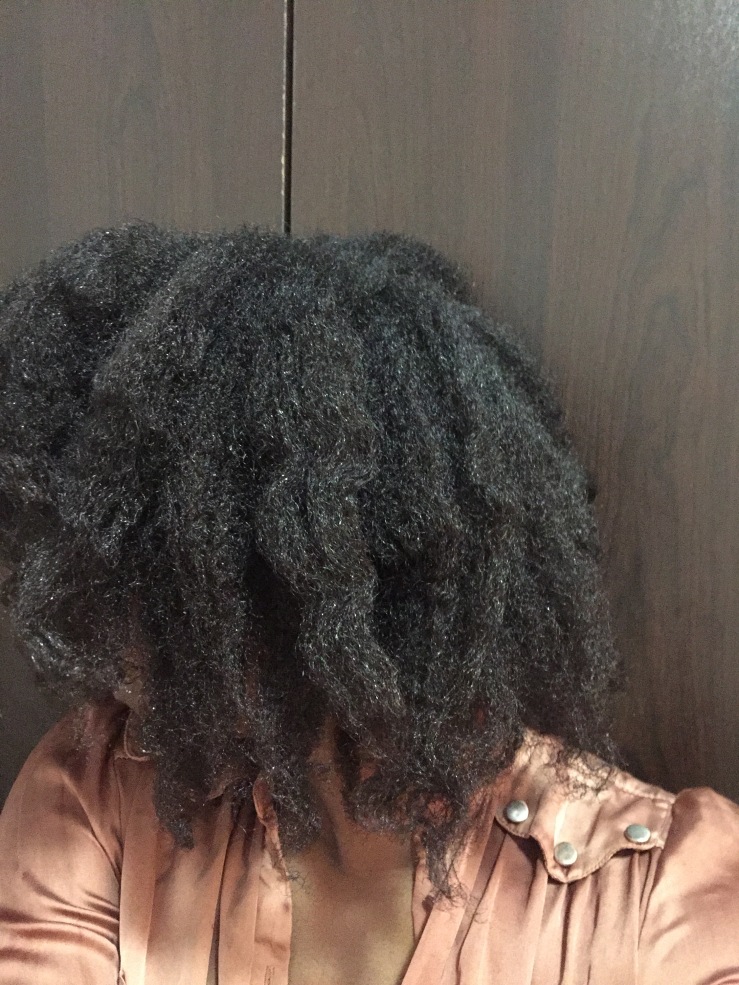
Hair has already dried, been moisturised and sealed. Sorry I forgot to take a picture during the rinse.

  
There you go guys!!!! Have a great weekend!!! Today is Friday I am off to do my green tea rinse hair. xxxxx


NATURAL HAIR CARE REGIMEN FOR BEGINNERS

IMG_2782.jpg

Hey hey hey, does the natural hair game seem a bit daunting? ToI many rules, don’t pre poo before your wrap your hair with the golden scarf? etc, etc. Well here is a simple hair regimen for everyone!!

  1. Detangle

Lots of hair is usually lost during the detangling process. A poor detangling method can lead to large amounts of breakage.  Detangling should be as gentle as possible. Detangling should only happen a maximum of once a week. Use more of your fingers so you can feel the knots in your hair before using a comb, and only use a wide tooth comb on your hair. DO NOT COMB EVERYDAY, only comb when hair is damp or saturated with conditioner, start from the ends and work your way up to the roots. DIVIDE YOUR HAIR IN SECTIONS ALWAYS DURING THIS PROCESS.

  1. Cleanse

Wash hair no more than once a week with a sulphate, DEA, MEA,TEA, UREA, phalates, Paraben, Mineral oil, silicone free , petrolatum etc free shampoo ( just by an organic or natural shampoo) or co-wash. AGAIN CLEANSE IN SECTIONS! Its important to clarify with a shampoo once a month or once every two months if you use a co-wash.

You can also chose to PRE POO with oil, however if you are using a co wash, this may not be necessary. Pre pooing (Pre shampoo) is when you apply oil to your hair and cover your head with a plastic cap and allow the oil to sit for at least 30mins, in order to protect your hair from drying out after shampooing.

  1. Condition/ Deep condition

Once you have cleansed your scalp, its important to add some moisture to your strands through conditioning. However, you can choose to skip the regular rinse conditioner step and go straight to deep conditioning, especially if you used a co wash. AGAIN DO THIS IN SECTIONS.

You can use a moisturizing or protein conditioner, depending on your hair needs. If you are using a protein conditioner, always follow with a moisturizing conditioner to achieve a protein and moisture balance. This balance aids hair flexibility and length retention.  Deep conditioners work best with heat, use a heat cap, hooded dryer, wrap your head with a towel to generate body heat, or work out while the deep conditioner is in your hair. DO NOT APPLY CONDITIONER TO YOUR SCALP!!!! EVER! This is because, some conditioners can clog your pores and stunt hair growth.  Deep conditioning should be done twice a month- once a month, especially if a co wash is used, otherwise weekly.

  1. Moisturize and Seal

After cleaning and conditioning the next step is moisturization and sealing. Improper moisturisation always causes hair loss and breakage. Dry hair breaks! Please see this post for the difference between greasy and moisturized hair, the two are often confused. The proper way to moisturize is the L.O.C method.

L- Liquid/Leave in

O- Oil

C- Cream (or butter)

Always use a leave in conditioner with water as its first ingredient or just plain water first on your hair. As water is the only true ingredient that moisturizes our hair. Follow with an oil and cream/butter to seal in the moisture from the water or leave in. Oils and butters are sealants, they cannot moisturize our hair, thus applying an oil or butter to dry hair will only leave it greasy.  Repeat this daily or every other day, even when its not your wash day.

  1. Protect

The final portion of this regimen is to protect your hair, style your hair in protective ways do braids, weaves, updos etc to prevent dryness and breakage. Sleep with a satin cap to prevent the cotton in your pillow case from dragging at your hair strands and snapping them of. Avoid the use of frequent heat, idealy your hair should only be blowdried a maximum of once a month. AVOID STRAIGHTNERS!!! Trim your ends no more than twice a year to get rid of knots and split ends, after your initial trim, with your new healthy hair practices and products you wont need frequent trims. Do NOT do tight hair and tight buns, they cause hair loss and baldness. Also do not scratch your scalp with your fingernails, this also causes baldness as it kills the hair follicles.


Have a blessed evening guys!


BEST SKIN CLEARING ROUTINE FOR ACNE PRONE SKIN

Hi guys, its been ages I know, but honestly I get so overwhelmed, but I have come back! Please leave a response in the comment section to let me know if you missed me!!! (kisses)!! The picture below is a before and after of my skin, its not easy be sharing this, but my customers have to understand when I say I have suffered the same issues as them.
IMG_3286

I decided to share my beauty regimen with you all, because I get asked what I used and how I care for my acne prone skin. When I recommend clays and oils it often seems a little strange, so this article is to show everyone the power of keeping it pure and natural. These have been my saving grace and I haven’t looked back! My skin is balanced, clearer and I have fewer breakout episodes. Honestly, I never thought I could have acne free skin, I felt that my oily skin has signed me to a life of battling breakouts, but no more!!! My skin is always clear these day, yes every now and a again I get a tiny pimple that very quickly goes back to where it came from!!! I have been on this routine for over 4 months now.


First of all to get that beautiful glow you have cleanse, exfoliate, mask, tone and moisturize and it has to be done in that order. Your skin must be clean before any treatment commences, afterwards you have to exfoliate to remove dead skin cells and unclog pores, this is necessary to clear out black heads and to give the lovely products you are about to put on your skin chance to penetrate your skin and work. Thereafter your face masks comes in, you can chose to steam your face before this or just go right ahead to this part, facemasks help draw out impurities, even the skin tone and tighten your pores, of course this depends on the ingredients of your mask. After this process use a good toner, to balance skin ph, even the skin tone, tighten pores, hydrate, reduce any inflammations etc, then finally you moisturize with a great oil or cream suited to your skin type!


These are the products I have used for the last four months and how I use them, they have worked beautifully and are all available for sale HERE:


Step 1- Cleanse


I wash my face with the Sheabutter cottage cocoa butter black soap, this is really gentle and non drying, it also contains neem which makes it excellent for combating skin infections, eczema and brightening the skin. When I ran out of that, the soap only lasted for about 6 weeks. I used OrganicLifeplus Moroccan black soap, this lovely soap contains eucalyptus oil which as antiseptic, antimicrobial and antibacterial properties so it was perfect for my skin. When I ran out of that soap I used pasuca soap, containing sugar cane juice and papaine, this was excellent for fading dark spots, brightening, controlling breakouts, it was also full of AHA which aids exfoliation. The properties of these soaps where all suited to my skin type and worked just fine, I wasn’t confined to one soap like I would have been if I was using a chemical product or bleaching cream.

FullSizeRender-22pasucasoap


Step 2- Exfoliate


I exfoliated my skin with a mix of adzuki bean powder, this is possibly the gentlest exfoliating product you could ever try. This bean powder from Ghana gently exfoliates the skin without irrating it like sugar or salt, so its perfect for the face. It aids cell repair and regeneration and removes dead skin cells. I mix this with honey, usually, some time I added hibiscus powder or lemon juice.

Step 3- Mask

I mix what I have now dubbed my clear skin face mask, the ingredients are fullers earth clay, aloe powder, amla powder, turmeric, activated charcoal, and rosewater. For the full recipe details and ingredient breakdown please see HERE


Step 4- Toning


Everyday, twice a day after cleansing I would wipe my face with some rosewater. I simply put it on some cotton wool and would wipe. On my mini facial spa days I would use rosewater as a toner right after rinsing of my mask. Rosewater helped with balancing my skin ph, calming redness and inflammation, fading scars, evening my skin tone, and it smelled awesome and made me happy lol.

FullSizeRender-23

Step 5- Moisturisation


This is key, no point doing all of the above and then using a cream or oil that would react to your skin. The perfect oil for my acne prone skin is rosehip oil, it filled with vitamins, antioxidants and essential fatty acids, its known to correct wrinkles and fine lines, fade acne spots, hydrates dry itchy skin and rejuvenates the skin to reveal a glowing complexion. This oil is also higher in linoleic acid as opposed to oleic acid which makes it perfect for acne prone skin, this means that apply it to acne prone skin will not lead to further pimples! This oil is a 10/10 . However, me being me decided to mix it with a few lovely oils I owned to see the effects, I blended it with carrot seed oil, touloucouna oil, lavender oil, tea tree oil, aloe vera oil and galbanum essential oil, and the result was amazing!!! This oil blend is a star blend for me! Perfect for my skin, the eczema I had healed, my complexion got brighter, no new acne, and acne scars where healing like it was their job!!

I repeated step 1 to 5, once a week and I repeat step 1, 4 and 5 twice a day. My face is still a work in progress, acne prone, sensitive skin is not easy to deal with, but this routine works for me and has kept my skin balanced, and every day it clears my skin up more and more!!!

So there you have it guys!!! If you want to try any of the ingredients they are available HERE


Have a blessed day xxx

HIDDEN DANGERS OF PROTECTIVESTYLING

4 hidden dangers of protective styling

Now that’s a title we all thought we would never see right? Well after an interesting experience I had with braids, I have to say long term protectivestyles are hot but they aren’t on fire! Lol in English that means that there are problems with protective styling, and its not perfect.  Let’s jump in, shall we?

Dryness, when you have your hair in a protective style like braids, weaves or even corn rows, you tend to forget about them and let your hair strands beneath fend for themselves. When you don’t wash, condition or moisturise your hair even while its in a protective hairdo it will get very very dry, and as I always say dry hair breaks. Also, even if your hair is conditioned, moisturised etc while its in a protective style, the fact is conditioners and moisturisers can’t penetrate your strands while its underneath a braid or a weave as well as they would if your hair was loose.

Damage to your edges, tight braids and tiny braids damage your edges.  When the braids/weaves/corn rows are too tight, they put too much pressure on your scalp and ruin the blood flow to your follicles, this in turn causes hair fall or baldness. When braids are too tiny, when you take them out it usually leads to you losing your edges. So my dear Nigerian sisters, never ever do one million braids as a means of protective styling, just say good bye to your edges if you attempt them. Also, when you leave some hair out in your weave and you are constantly using heating tools to blend your leave out hair with your silky straight or European curly weave, that also causes breakage for that part of your hair, as the heat will literally burn of your hair and weaken your strands.

They weigh down your strands, when you use 20packs of expression or 50 packs of kinky braids on your hair you put excessive pressure on your scalp and strands. This leads to baldness, that’s why you find that sometimes your braids just fall of your scalp, with your hair in tow (lmao this used to happen a lot when I was a child). Avoid anything that puts excessive pressure on your hair and scalp.

Tangles, leaving protective styles in for too long can cause the tangles of a life time!!! Oh I need to do a separate post on how my hair endured some very serious untangleable (if that’s a word) tangles!!!! It was terrible! I left my braids in for 8 weeks, and on top of that transgression I took them out and was too tired to detangle the huge knots at the time, so I left them tangled for another 2 weeks before detangling!!! Oh it was a terrible nightmare!! While washing and conditioning your hair is great while it in a long term protective styles, it also causes build up near your roots, where your stylist picks your braid to attach it to your hair. That build up clumps together and creates amazing knots, that are difficult to untangle!!!

So there you go, the hidden dangers of protective styling, to avoid these horrible realities, always wash, condition and moisturize your hair while its in a protective style and never leave your braids and weave in for more than 6 weeks!! Also, remember to dilute your conditioner and shampoo with water before your wash your hair will its in a protective style, this reduces the build up that cause those massive clumps in your hair.

Have a blessed day 😉


My night time routine! 

  
Hi guys! 

This is just a quick post detailing what I do to my hair before bed. I perform this ritual to keep my hair moisturised and tangle free constantly. After my recent experience with detangling I have learnt that prevention is better than cure!! Every natural both new and seasoned must keep their hair in a manner that prevents it from tangling on itself while you are asleep. It’s necessary to prevent future breakage and hassle. This process takes about 10-15mins. So here is what I do: 

1. I spritz my hair with a mix or rose water and peppermint oil ( this oil is now my new best friend since I discovered it scientifically grows hair, see HERE for that post). That’s why in the video below I kept closing my eyes, the oil stings the eyes a bit. This step is optional and you can go straight to the leave in, but I like the extra moisture it gives.

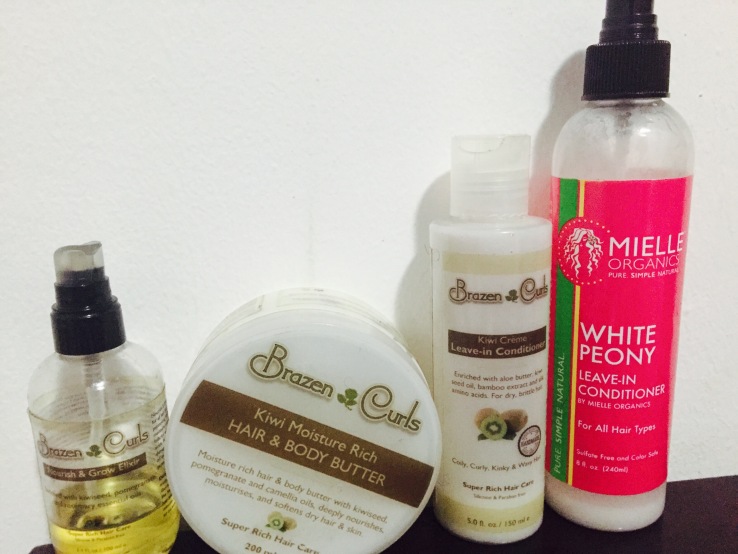
2. I put my hair in sections, spritz each section with my rose water and peppermint oil, follow with either my Mielle Organics White Peopy Leave in conditioner or My Brazen curls Kiwi creme leave in, both are sold HERE, then I use my Brazen curls growth enhancing oil also sold at the beautifully nappy shop, then seal all the moisture up with Brazen curls hair and body butter. 

3. I twist up each section after moisturizing. Afterwards I roll each section up in a Bantu knot, this step is totally optional. 

As you can see in the video I do light finger detangling and dusting as well, so my hair is nice and tangle free in the morning.

Please see the video below for full details. This is so cool I am easing into doing videos!! Yay lol. 


Results this morning!!!


How to Flat Twist! 

Hello,

This post is for those that might have missed the brief tutorial I did on my instagram page.  Sometimes styling our natural hair can be daunting, from not knowing what to do, to just not being gifted at creating wonderful styles! So I am part of the “not so gifted with hair crew”, so here is my go to style of life, and it can be used to achieve other styles. It’s also extra super low manipulation. The amazing flat twist! See video below! Please let me know if you try it.

  
Hope this was helpful! Have a blessed evening xxx

Peppermint oil!! Scientifically proven to aid hair growth!!

  
Source : 

Ji Young Oh, Min Ah Park, and Young Chul Kim. “Peppermint Oil Promotes Hair Growth without Toxic Signs”. Toxicology Research, Volume 30, Issue 4 Dec. 2014, pp. 297–304.

Over time the amazing benefits of peppermint oil have been documented. Its known to have anti bacterial and anti microbial properties. Using peppermint oil to massage your head has been known to relieve headaches. It’s also anti inflammatory and helps with nausea.

However, in December 2014, a study of the hair growth benefits of peppermint oil was finally published. This study compares peppermint oil to the popular minoxidil ( this has been widely used by doctors to treat hair loss). 

For the experiment 100% pure peppermint oil was diluted with a carrier oil (Jojoba oil was used in this case), the mixture was then applied topically for 6 weeks, once a day for a period of about 1 month. The results show that peppermint oil had a more pronounced effect on growth as opposed to the other compounds.
The experiment was conducted on mice, it showed that after 4 weeks the peppermint oil led to 92% hair growth and the minoxidil had led to only 55% hair growth. Also with the use of PEO (peppermint essential oil), the depth size of the hair follicles had actually increased.
So if you are suffering hair loss or missing edges, try some peppermint oil!!! A snap shot of a quote from the research is as follows:

“In conclusion, our experimental data suggest that 3% PEO facilitates hair growth by promoting the conservation of vascularization of hair dermal papilla, which may contribute to the induction of early anagen stage. In addition, PEO effectively stimulated hair growth in an animal model via several mechanisms and thus could be used as a therapeutic or preventive alternative medicine for hair loss in humans” 

So there it is guys! A non toxic hair growth product! Purchase pure Peppermint Essential oil HERE
Have a great evening xxx

8 Benefits of Rosewater and 9 ways to use it


Untitled design

Holla, so many posts should have come before this, however, I am doing this for the benefit of my newsletter subscribers, which you can be a part of if you sign up HERE, get the latest scope in the natural hair community and organic skin care.

So on to discussing this amazing floral water. Rosewater is actually an amazing addition to your skin and hair regimen, its one wonderful ingredient I feel is underused in skin care.  Rosewater is a superb floral water that is highly beneficial to your hair and skin. However, after we have explored the awesome benefits of this products, please be sure to purchase it from the right source. Some suppliers simply put a rose scent in regular water, which does not give you the positive benefits of pure rose water. Purchase high quality Rose Water HERE.

IMG_1418

Benefits


  1. Slightly astringent properties so it helps fight acne, contact dermatitis and eczema
  2. It helps heal scars, cuts and wounds
  3. It cools down inflamed, red and blotchy skin
  4. Due to its astringent properties rosewater helps clean pores and tone the skin.
  5. It helps the skin maintain its PH balance and controls excess oil.
  6. The nourishing and moisturizing qualities of rose water enhance the quality of the hair. It also helps treat mild scalp irritations and get rid of dandruff. It works wonders as a natural conditioner and revitalizes hair growth.
  7. Also an antioxidant rose water helps strengthen skin cells and regenerate skin tissues.
  8. It suitable for aging skin as it keeps fine lines and wrinkles away
IMG_1471
Rosewater and Hair oil as a night time hair conditioning routine


How to use it

  • To prevent eye puffiness: Busy schedule= no sleep= puffy eyes! Well bye to that!! Simply chill your rosewater in the fridge for about an hour and half. Apply some of the chilled rosewater to a cotton pad and then place it on your eyes. It will help sooth the tender skin around your eyes and prevents or reduces eye puffiness.
  • After Sun body spray: Spray it all over your body to soothe sunburns and heal redness or itchiness.
  • For Acne: Mix juice from one lemon and rose water in equal parts, apply the mixture to your face and leave it on for an hour. Rinse of with water, after about 2-3 weeks there would be a visible difference in your skin. The rosewater will help remove the blemish and scars. You can also mix 1 table spoon of fuller’s earth clay (purchase fullers earth HERE with enough rosewater to make a paste, apply it to your face and leave it on for 5-10mins.
  • Freshen your face throughout the day: Especially in our hot whether rosewater can be your friend. Just spray the rosewater mist on your face, it will instantly freshen your skin, naturally hydrate and nourish it. It instantly gives you a wonderful radiance and glow. Personally its great to always have a bottle in your bag so you can freshen your skin through out the day.
  • Facial toner: Most toners available on the market contain chemicals and alcohol. Using these on a regular basis will make your skin dry and age your skin in time. Rosewater is a better and more natural alternative to these chemical laden toners. Immediately after cleansing, apply some chilled rosewater to your face with a cotton pad. This will naturally tone up your facial skin, it will close your pores and give your skin a glow.
  • Natural makeup remover: Just apply some rose water on a cotton pad and gently remove your makeup with it. To make it more effective, you can dampen the bad with rosewater and add some coconut oil to the dampened pad and massage your face in the cotton pad in a circular motion. If you have oily skin replace the coconut oil with rosehip oil (available on request), pomegranate seed oil, grape seed oil etc.
  • Natural setting spray: Rosewater can be applied sparingly over the makeup as a setting product, providing beautiful, healthy glow and amazing dewy finish.
  • To soften dry skin: Use rosewater as a body spray to soothe and soften dry skin immediately.
  • Aromatherapy: The beautiful floral scent of rosewater on your pillow is said to aid sleep and leave you feeling well rested and refreshed in the morning.


Have a blessed evening!!


DIY ACNE REMEDY CLAY MASK


Hey hey,

This post is long overdue, this is natural mask I use when I have hormonal acne or when my skin is acting up. I use this mask once a week, it balances my sebum production and keeps my skin clear and beautiful. Its an excellent natural alternative to chemical solutions. Suitable for sensitive skin. If I have any pimples prior to doing the mask, after 1 or 2 sessions the pimples reside. So yes I love it.

This mask is ideal if oily, acne prone skin like mine. What you will need

  • Aloevera powder – 1 teaspoon
  • Activated charcoal (optional) – 1/4 teaspoon
  • Turmeric (optional)  – 1/2 teaspoon
  • Fullers earth clay- 1 or 1/2 table spoon
  • Amla powder- 1 teaspoon
  • Rosewater/ Aloevera juice/ purified water- enough to make a paste

Combing all these ingredients in a bowl and leave on your skin for 5-10minutes maximum. Don’t wait for it to be totally dry and flaky, leaving face masks on for two long can draw out moisture from the skin and cause further irritation. So no longer than 10minutes. See short video below for the general idea.


So why it will work?? Ingredient break down time:

  • Aloe Vera powder- This powder product of India is derived from the whole aloe plant. It contains vitamins A, B1, B2,B6,B12 ,C, E, and folic acid. It’s filled with minerals like iron, calcium, zinc, potassium, sodium etc making it excellent for both the hair and skin. It will help heal the scars on your face, moisturise your skin and heal pigmentation and burn marks. This powder aids cell regeneration and its intensely healing. It will reveal a glowing and bright skin after a 1 or 2 applications. To purchase see Here

  • Amla powder: Rich in vitamin A, which is essential in collagen production Amla powder helps to keep the skin elastic and youthful looking. It’s anti- inflammatory and helps calm red, blotchy skin. Amla is also rich in vitamin C and naturally brightens and lightens the skin. To purchase see Here

  • Tumeric powder: This is great for oily and acne prone skin. High is vitamin C it also naturally lightens dark spots. It’s antiseptic and anti bacterial in natural so it fights breakouts and pimples to keep the skin looking youthful. It’s soothes skin burns and it’s excellent in the treatment of wrinkles.

  • Activated charcoal: This is used to trap and flush out toxins from the body! Both internally and externally. The activated charcoal will draw out impurities from the skin. It’s effective in treating acne, body odor, insect bites and rashes.

  • Fullers earth clay: Nature has provided this magic clay to ease all our skin woes. It has oil absorbing, cleansing and antiseptic properties. It improves the skin complexion, treats acne, fades scars and improves skin elasticity. To purchase see Here

  • Rosewater: I used both Rosewater and bottled water in this mask,  because my rose water had ran out it wasn’t enough to make a full paste. Rosewater helps calm inflamed skin, it’s filled with antioxidants and it’s also anti aging. It’s a great cleanser and removes oil and dirt in accumulated clogged pores. It helps hydrate, moisturise and revitalize the skin. It helps strengthen skin cells, and regenerate skin tissues. To purchase please see Here

Have a blessed day everyone!!! Xxx

How Sugar is affecting your child’s health

Sugar 26.11.2015

As a young child growing up in Nigeria, sweets were a weekly treat at best.  Soft drinks were only available at special occasions like birthdays, Easter or at Christmas, and chocolates were definitely only an Easter or Christmas affair. Breakfast was usually porridge or cornflakes, lunch and dinner were always home-cooked, and were nutritious meals containing heaps of vegetables, unrefined carbohydrates and lean meats. Snacks without a doubt were fruits since seasonal produce including coconuts, bananas, oranges, tangerines and guavas were in plentiful supply. In my time, fast food restaurants were rare and trips to them even rarer. You may be reading this thinking my childhood diet was on the extreme side of healthy – granted. However, you have to admit too that the diet children eat these days, especially children in the middle/upper class is on the extreme side of unhealthy. With the influx of KFC, Dominos, Coldstone, there is now an increased availability of pizzas, ice cream, chocolates, burgers, soft drinks, cakes and all other sugary foods. Consequently, kids are constantly eating RUBBISH!  As parents, we should be responsible for teaching our children the right way to eat rather than allowing them access to foods that do nothing more than increase their savings account of future health problems. It may not be immediately obvious to you, but excessive sugar consumption in the form of refined carbohydrates is preparing your child for a future full of the following health problems:

  1. Dental caries: Excessive sugar consumption promotes frequent deposition of plaque on the surface of the tooth. The bacteria in plaque break down the sugar into acids that degrade the teeth, leading to decay. Tooth decay occurs faster when the teeth are not cleaned with fluoride toothpastes after eating sugary foods.
  1. Overweight and obesity:Gone are the days when kicking a football, racing or playing some sort of hopping game was recreational. Nowadays, its all about playing a video game, watching television or playing on the iPAD while eating crisps and drinking something sugary. The lack of activity and overcompensation with sugar results in the conversion of the sugar to fat, which then leads to children becoming overweight and eventually obese.
  1. Insulin resistance and type II diabetes: Insulin is the hormone produced when a meal containing sugar is eaten. Its role is to lower blood glucose levels to normal levels after a meal containing sugar is eaten. If large amounts of sugar are eaten regularly, insulin becomes insensitive to changes in blood glucose levels and then loses its ability to normalise glucose levels. With continuous high blood sugar levels and no diet or lifestyle changes, type II diabetes ensues.
  1. Cardiovascular disease: People who eat diets high in sugar tend to have low levels of the good type of cholesterol. This can possibly increase the risk of developing cardiovascular disease.
  1. Infertility: High sugar diets can affect a woman’s ability to ovulate and therefore an inability to conceive.

To be forewarned, is to be forearmed.

References:

  • Touger-Decker R and van Loveren C. Sugars and dental caries. American Society for Clinical Nutrition 2003; 78:8815–8925.
  • Basu S, et al. Relationship of soft drink consumption to global overweight, obesity, and diabetes: a cross-national analysis of 75 countries. Am J Public Health 2013;103: 2071–2077.
  • Howard B and Wylie-Rosett J. Sugar and cardiovascular disease. Circulation 2002;106:523–527.
  • Chavarro J, et al. A prospective study of dietary carbohydrate quantity and quality in relation to risk of ovulatory infertility. Eur J Clin Nutr. 2009;63:78–86.
  • Domas WC, et al. Health implications of high-fructose intake and current research. Adv Nutr. 2015;13:729–737.

Article by Somi Dopes-Igbene(PhD) of Midas Naturals Ltd

Follow on social media: @midasnaturals

Read more health articles at www.midasnaturals.com or subscribe to health newsletters at:

http://www.midasnaturals.com/newsletter